Build an IT Request Tracker Without Code | With Template!
Set up a lightweight internal tool to manage equipment and support requests, no devs or tickets needed.
Overview
This guide shows you how to build an internal IT request system using JTrack’s interactive flowcharts. It’s perfect for small teams or IT departments that want a lightweight alternative to bulky ticketing tools.
Who’s this for?
This guide is for anyone looking to replace email chains and Excel trackers with something more structured— without rolling out a full-blown ticketing system. Think office managers, ops teams, or solo IT admins.
What skills do I need?
None. JTrack is a no-code platform, so you won’t need to write a single line of code. If you can click through a UI, you can build this.
What are we going to build?
We’ll use JTrack to build a simple IT request tracker where users can submit equipment or support requests. The process will guide requests through approval and fulfillment. Here’s what the flow will include:
- Collect request details using a Form Step.
- Ask for approval with a Question Step.
- (Optional) Lock the approval step to specific team members.
- Provide IT with instructions using an Information Step.
- Confirm equipment delivery with a final Form Step.
- Track everything with a custom table view.
🚀 IT Request Template Ready!
Skip the setup! this template has everything you need to track IT requests.
Sign up and launch your workflow with one click.
Create Your WorkflowStep-by-Step Guide
To get your IT request tracker up and running with JTrack in less than 15 minutes, follow the step-by-step instructions below:
Step 1: Signing up and creating a new flowchart
- Sign up to JTrack using your email and password at web.jtrack.app
- On the flowcharts screen, click the 'Create new flowchart' button.
- Select the 'Create a blank flowchart' button to create a new flowchart from scratch.
- Give your flowchart a name, such as 'IT Request Tracker', and press Continue.
You will now be presented with a blank canvas like the image below in which you can begin building your flowchart.
In this screen you can:
- Use the mouse scroll to zoom in and out on the flowchart.
- Click and drag in empty space to move the canvas around.
- Click the '+' button below the start step to add a new step.
- Click on a step to edit its properties in the step options screen.
Step 2: Creating the flow steps
We're going to create an example IT request flow with the following steps:
- Form Step: Collect request details.
- Question Step: Ask for approval, requests can be approved or denied.
- Information Step: Provide instructions to IT.
- Form Step: Confirm equipment delivery.
To start with, we're going to configure all the steps required for our flow.
- Click the + button below the start step to begin adding your first step.
- Our first step involves collecting information about the IT request, so select 'Form Step'.
- Give the step a name, we're going to call it 'Request Info'. Enter the name and press continue.
- We're going to configure the form in a later step, so click finish to end the process.
Our flowchart should now look this with a start step and a single Form step.
Our next step involves asking for approval for the IT request. In this step, we want to ask the user a question (should this request be approved?) and change the outcome of the flow based on the answer. Later, we can lock this step down so that only certain team members can approve the request.
- Click the + button below the 'Request Info' step to add a new step.
- Select 'Question Step' and give it a name, we're going to call it 'Request Approved?'. Press continue to save the question.
- In the 'What question do you want to ask?' box, enter 'Should this request be approved?'. Press continue.
- We can now enter the different multiple choices options for this question. In this case it's a simple yes or no.
Press continue to finish setting up the question. You will now see that the question and two trailing options have been added to the flow (yes and no).
For the purposes of this example, we're going to let the process end if the response is no. If the response is yes, we want to provide the IT team with instructions on how to fulfill the request. To do this, we need to add an information step.
- Click the + button below the question step to add another new step.
- Select 'Information Step' and give it a name, in our case it's 'Picking Info'. Press continue.
- We have two options here:
- We can upload a PDF with instructions for the IT team.
- We can enter instructions manually into a text editor.
- We're going to enter some example text directly into a text editor. Select 'Type custom text' and press continue.
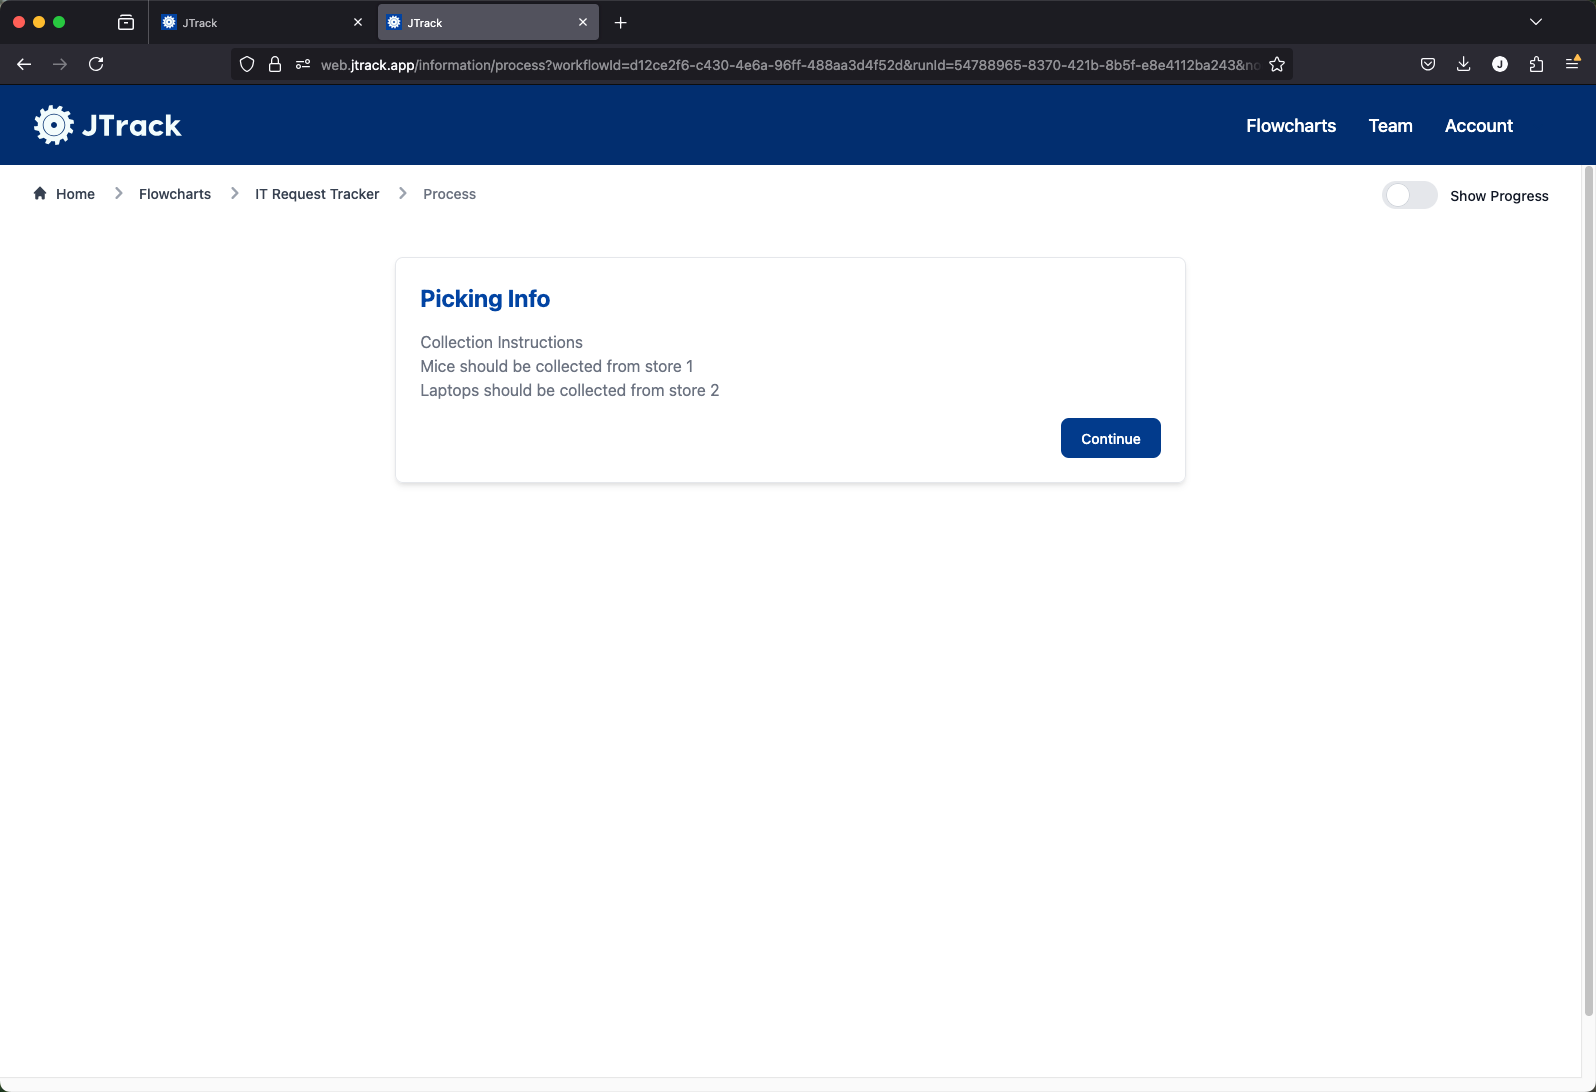
For demonstration purposes, we're going to enter some example text. In a real-world scenario, you would enter instructions for the IT team on how to fulfill the request.
Press continue to finish setting up the information step. You will now see that the information step has been added to the flow.
Our final step to add is a Form step to confirm that the equipment has been delivered. This step will be used to collect the name of the person who received the equipment and the date it was delivered.
- Click the + button below the information step to add another new step.
- Select 'Form Step' and give it a name, in our case it's 'Delivery Confirmation'. Press continue.
- Press continue again to leave the step setup (we'll build the form in a later step).
We now have all the steps we need to complete our flow. The final flow chart should look like the image below.
Step 3: Creating the forms
Now that we have all the steps in place, we can start configuring the forms for each of our Form steps. JTrack features a fully customisable form builder that allows you to create forms with a variety of different field types.
To start with, we're going to configure the form for the 'Request Info' step. This is the form that will be displayed to the user when they start the flow.
- Click on the 'Request Info' step to open the step options.
- Click on the 'Launch Form Builder' button to open the form builder.
- Click the 'Add Widget' button to add your first form widget.
You will now see a carousel of different field types that you can add to your form. Each field type has a preview box showing what an example of that field type looks like. Use the arrow buttons to scroll through the different field types.
For our request form, we're going to add the following fields:
- Text Input: Name of the person making the request.
- Select Input: A dropdown list of equipment types.
- Date Input: Date the equipment is needed by.
To begin adding fields:
- Use the arrow buttons to find the 'Text input' type. Press select.
- Under 'Label text', type 'Name'. You should see the preview box change to match your new label.
- Press finish to add the field.
You will now see that the field has been added to the form. You can hover over the field to edit or delete it. You can also press the preview button to test the form as a user would see it.
We are now going to repeat the process to add the other two fields to the form:
- Click the 'Add Widget' button to add a new field.
- Use the arrow buttons to find the 'Select input' type. Press select.
- Under 'Label text', type 'Equipment Type'. You should see the preview box change to match your new label.
- You can add multiple choices for this question in exactly the same way as the question step. We're going to add 'Mouse' and 'Laptop' as our two options.
- Press finish to add the field.
- Once again, press 'Add widget' to add a third widget.
- Use the arrow buttons to find the 'Date input' type. Press select.
- Under 'Label text', type 'Date Needed By'. You should see the preview box change to match your new label.
- Press finish to add the field.
You will now see that the two fields have been added to the form and your final form should look like the image below. Press save and close to save the form and close the form builder.
We are now going to repeat the process to add the other two fields to the form for the 'Delivery Confirmation' step.
- Click on the 'Delivery Confirmation' step to open the step options.
- Click on the 'Launch Form Builder' button to open the form builder.
- Click the 'Add Widget' button to add your first form widget.
- Use the arrow buttons to find the 'Text input' type. Press select.
- Under 'Label text', type 'Name of person receiving equipment'. You should see the preview box change to match your new label.
- Press finish to add the field.
- Click the 'Add Widget' button to add a new field.
- Use the arrow buttons to find the 'Date input' type. Press select.
- Under 'Label text', type 'Date equipment delivered'. You should see the preview box change to match your new label.
- Press finish to add the field.
You will now see that the two fields have been added to the form and your final form should look like the image below. Press save and close to save the form and close the form builder.
That's it, we have completely configured our IT request tracker. You can now run the flow and test it out. To do this, click the 'Run Flowchart' button in the top right corner of the screen.
Upon clicking the button you will be redirected to the first step in the process. You can now fill out the form as a user. Enter some details for name, equipment type and date needed by. Press continue to move to the next step.
Once you have completed the first step, you will be shown a confirmation screen. This screen shows you the current place in the flowchart and gives you the option to move to the next step.
In our process, we'd like the initial requesting user to be redirected out of the flow at this point (we don't want people approving their own requests!). However, for this test run we'll complete the whole flow ourselves.
By clicking on 'Start next step', you will be redirected to the approval step of the flow. Select 'Yes' and press continue to approve the request. You will again see the transition screen showing you the current step. Click 'Start next step' to move to the information step.
As this step is just an information step, press 'Start next step' to move to the final step.
You will now be shown the final step in the process. Enter the name of the person receiving the equipment and the date it was delivered. Press continue to finish the process.
Now the flow is complete, you will be redirected to the 'Workflow runs' screen. here you can see your initial run. We'll go into more detail on how to view and manage your workflow runs in a later guide. For now, you've successfully created and run your first IT request tracker with JTrack!
Further Reading
- Follow this guide to learn how to add permissions to your flowchart, to limit the people who have approve requests.
- Follow this guide to learn how to view your runs, including how to customise the table to show the data you want.
Ready to build your own?
Sign up for a free JTrack account and start building in minutes.
Try JTrack Free